
Open Pixlr Editor:
Go to the Pixlr website (https://pixlr.com/e/ )and click on the “Open Pixlr Editor” button. This will launch the Pixlr Editor interface.
Create a new document or open an existing image:
You can either create a new document by clicking on “Create New” or open an existing image by clicking on “Open Image” and selecting the image from your computer.

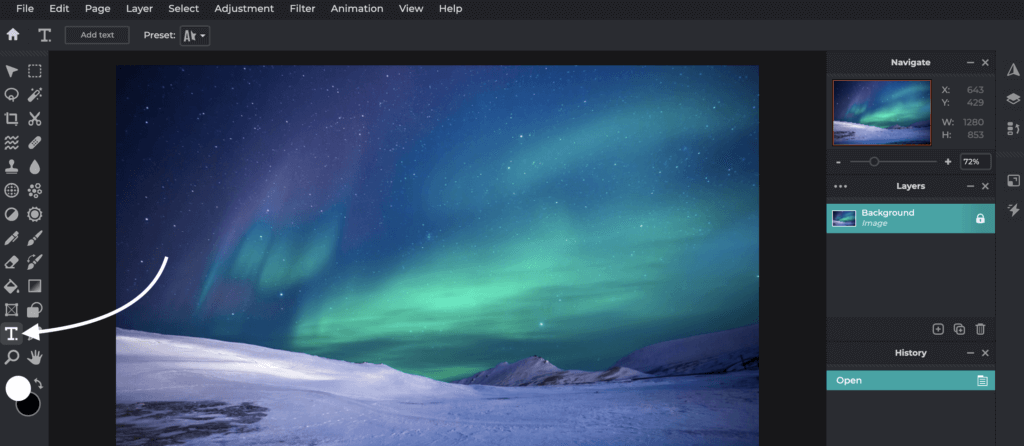
Select the Text Tool:
On the left-hand side of the Pixlr Editor, click on the “Text Tool” icon from the toolbar. It looks like a letter “T”.
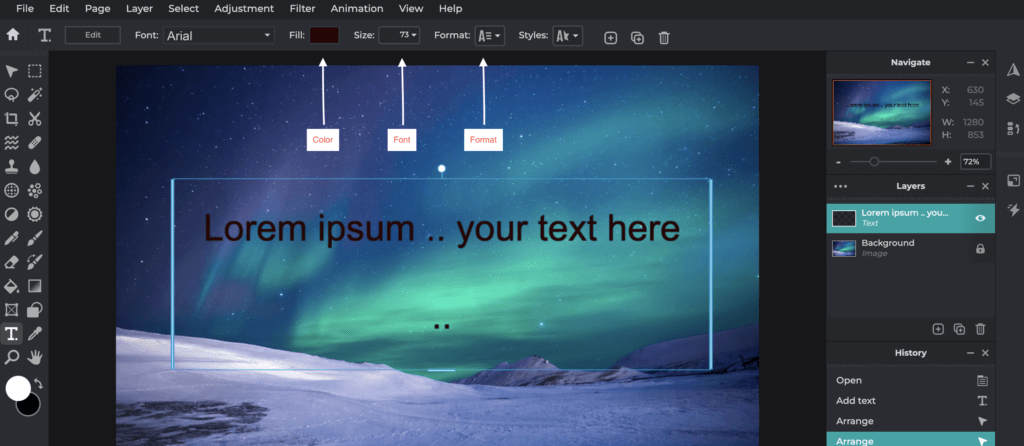
Set text options:
In the top menu, you’ll find options to customize the text tool. Choose the desired font by clicking on the font dropdown and selecting a font from the list. You can also adjust the text size, style (bold, italic), color, and alignment using the respective options.
Click on the canvas:
With the Text Tool selected and the desired text options set, click on the canvas at the spot where you want to add the text. A text box will appear at that location.
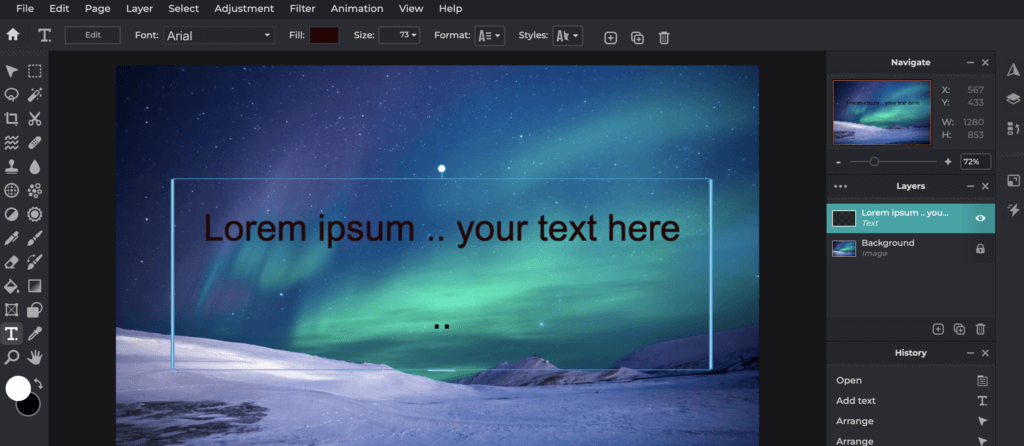
Enter your text:
Click inside the text box and start typing the desired text. You can also paste text from your clipboard if needed. The text will appear in real-time as you type.
Format and position the text:
To format the text further, you can select specific words or characters within the text box and modify their properties using the options in the top menu. Additionally, you can resize, rotate, or reposition the text box using the “Move” and “Transform” tools available in the top menu.
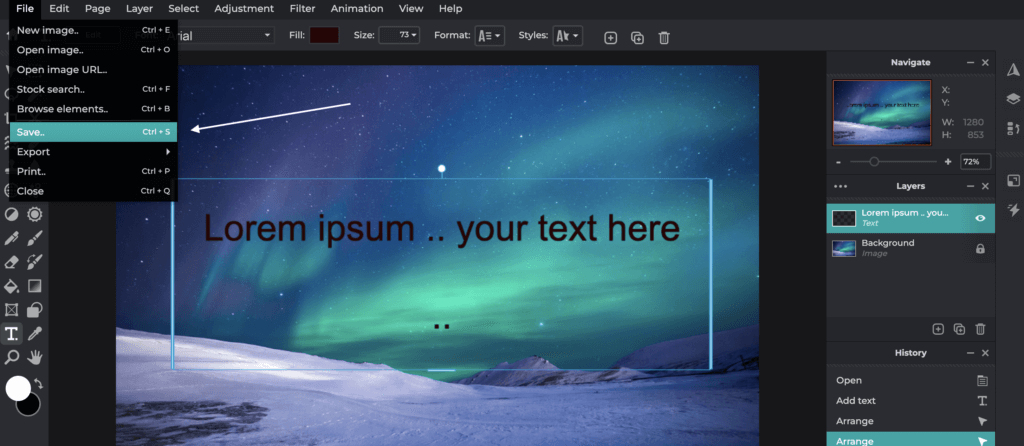
Save your image:
Once you’re satisfied with the added text, go to the “File” menu and choose “Save” or “Save As” to save your edited image. Select a desired file format (such as JPEG or PNG) and specify the destination folder on your computer.
That’s it! You have successfully added text to your image using Pixlr Editor. Remember to save your work regularly to preserve your changes.